Vegetable prep is the part of cooking nobody talks about but everyone resents. You pull out a cucumber for a salad and fifteen minutes later you are still at the cutting board, slices uneven, fingers cramping, wondering why dinner takes so long. A sharp chef's knife helps, but it does not solve consistency. A cheap V-slicer gets you thin cuts but wobbles everywhere and terrifies you after one close call. The Mueller Pro-Series Mandoline Slicer sits between those two options and closes the gap: stable, adjustable, fast, and built for the kind of daily prep that actually makes home cooking sustainable.
This guide walks you through exactly how to use a mandoline slicer correctly, from setup to cleanup. If you have avoided mandolines because of the safety reputation, that concern is valid and addressable. The technique matters more than the tool. Get the technique right and you will move through a full week's worth of vegetable prep in the time it used to take you to slice one zucchini.
Still spending 15 minutes on slicing that should take 3?
The Mueller Pro-Series Mandoline gives you 12 blade options, an adjustable thickness dial, and a stable no-slip base. It has 39,754 reviews and a 4.5-star rating. Check current pricing before you spend another dinner at the cutting board.
Amazon Check Today's Price on Amazon →Step 1: Set Up Your Mandoline on a Stable, Non-Slip Surface
Most mandoline accidents happen because the slicer shifts mid-stroke. Before you touch a vegetable, place the mandoline on a damp kitchen towel or a silicone mat. The Mueller has rubber feet on its base, which helps, but a damp towel underneath eliminates even micro-movement. Set the unit at the edge of the counter with the collection end over a large bowl or directly over a cutting board so sliced pieces land cleanly.
If you are using the folding stand legs, extend them and make sure they click into place before you start. A wobbly mandoline is a dangerous mandoline. Thirty seconds of setup here saves you a trip to urgent care. I usually set mine at a slight downward angle toward the bowl so gravity helps pull the slices through cleanly.
One more thing: never set up a mandoline on a round plate or a bowl rim. You want a completely flat, firm surface under the unit at all times. If your counter is particularly slippery, a damp dish towel folded to double thickness works better than any mat I have tried.
Step 2: Put On Your Cut-Resistant Glove Before You Touch the Blade
The Mueller slicer comes with a food holder, but a cut-resistant glove is the safer and faster option for most vegetables. The food holder is best for large, dense items like potatoes or beets. For anything smaller, like cucumbers, zucchini, or fennel, a glove lets you keep a flatter hand position and maintain better control over the vegetable's angle and pressure.
ANSI A4-rated cut-resistant gloves run under ten dollars on Amazon and are the single best kitchen safety purchase you can make alongside the slicer. Put the glove on your non-dominant hand, the hand that holds the vegetable. Your dominant hand controls the mandoline frame, not the food. This distinction is important: your slicing hand should never be near the blade.
Once the glove is on, do a quick awareness check. Know exactly where the blade is. Look at it before you start so muscle memory builds the correct hand path. This sounds obvious, but it is the step most people skip on their second or third session, right before they get complacent and make a mistake.
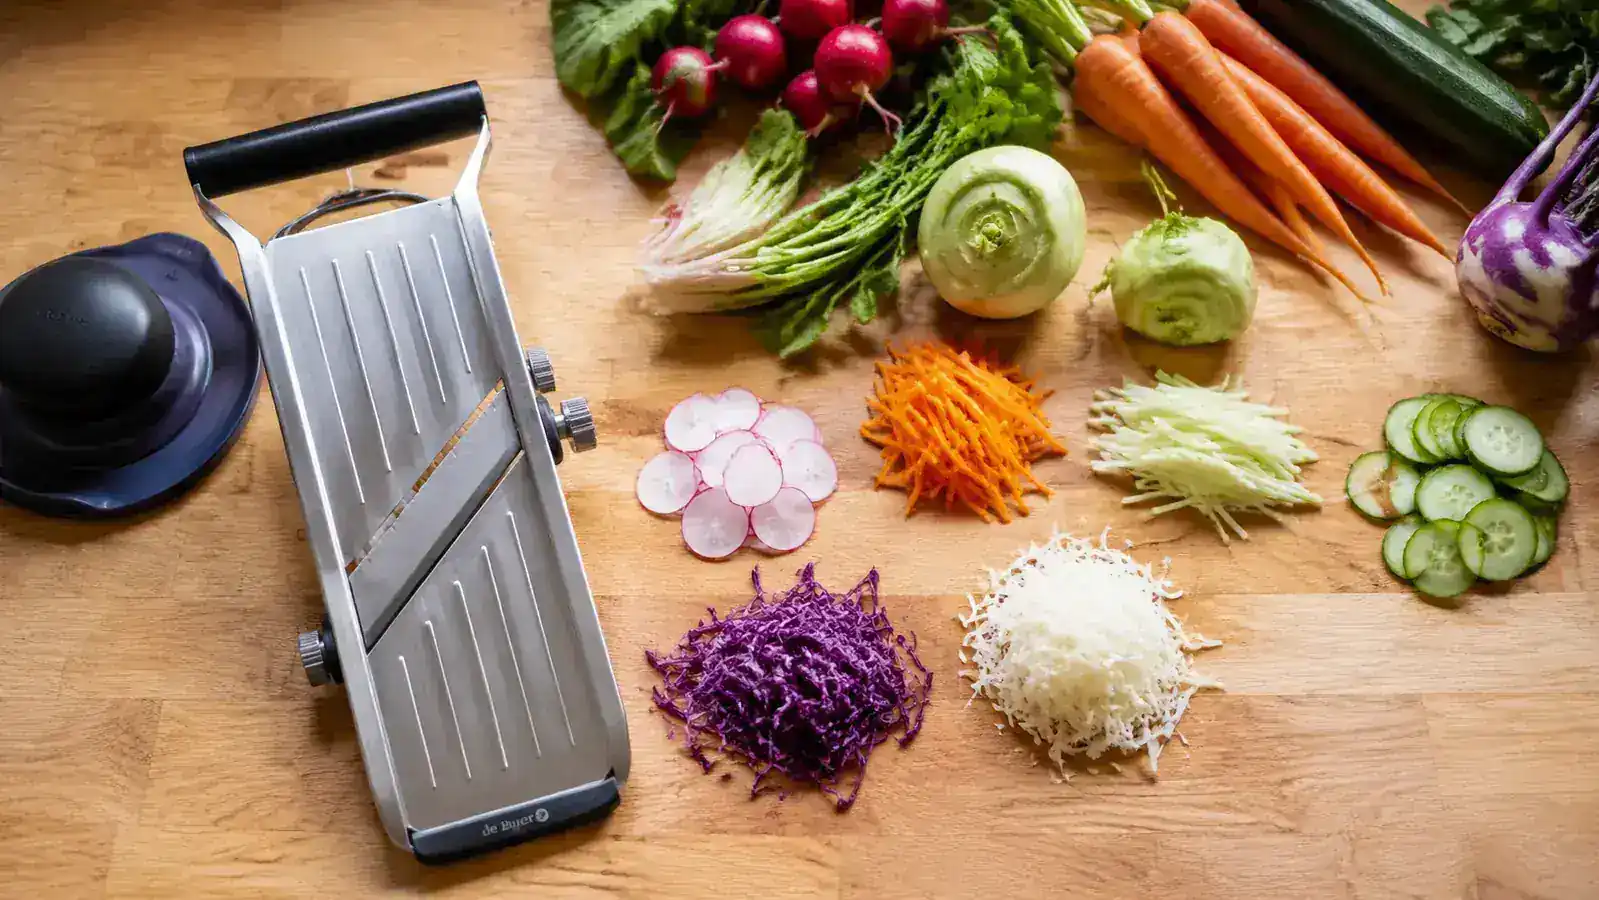
Step 3: Choose the Right Blade and Set Your Thickness
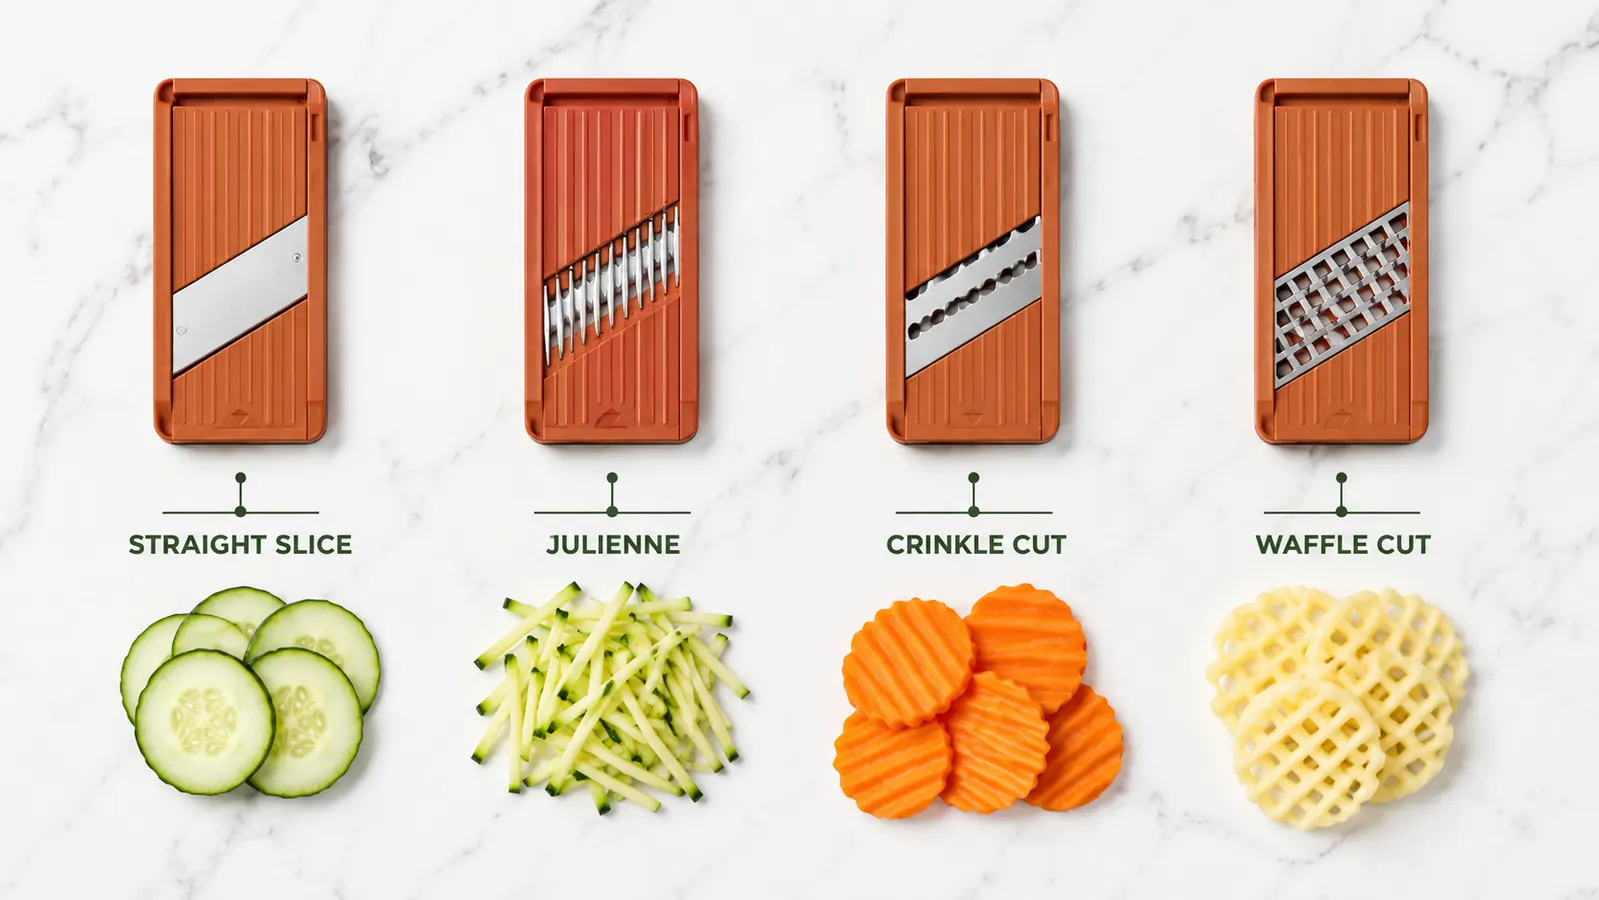
The Mueller comes with 12 blade options, which sounds overwhelming but breaks down simply. For most vegetable prep, you will use three: the straight slice blade for salads, gratins, and sheet-pan meals; the julienne blade for stir-fries, slaws, and noodle-style cuts; and the crinkle blade for cucumber chips or anything where texture matters for presentation. The waffle blade is for gratins and fries when you want a decorative cut.
Thickness is controlled by the dial on the side of the frame. For thin cucumber salad slices or zucchini chips that will dehydrate or roast quickly, set it around 1 to 2mm. For potato gratins or fennel salads where you want some bite, go 3 to 4mm. For stir-fry vegetables where you still want a firm slice, 2 to 3mm works well. When in doubt, start thinner. You can always adjust upward for the next batch, but you cannot un-slice something that came out too thick.
Click the blade insert firmly until you hear it seat. Give it a light tug before you start slicing to confirm it is locked. A blade that is partially seated is the second most common cause of mandoline accidents, right after not using a glove. If a blade feels loose after clicking, remove it and re-seat it from the beginning.
Step 4: Prep Your Vegetables Correctly Before They Touch the Blade
Round vegetables roll. Anything that can roll on your mandoline will, and that unpredictability creates risk. Take thirty seconds before you start slicing to cut a flat face on any round vegetable. Slice off one end of a cucumber or zucchini lengthwise to create a flat base, then run that flat side against the mandoline. This gives you stable, predictable contact with the blade and stops the vegetable from wobbling mid-stroke.
For fennel, remove the stalks and cut the bulb in half through the root. The flat cut side goes down on the slicer. For cabbage, remove the outer leaves, cut in half or quarters, and keep the core intact while slicing. The core acts as a handle and keeps the layers from separating until you are done.
Wash and dry your vegetables before slicing. Wet vegetables slide unpredictably on the blade. A quick pat with a paper towel takes five seconds and makes a noticeable difference in slice consistency and control. Hard root vegetables like carrots and parsnips benefit from peeling first so the exterior is smooth and consistent against the blade.
Most mandoline accidents happen in the last two inches of the vegetable. That is when you are closest to the blade and least likely to still be paying full attention. Stop there. Every time.
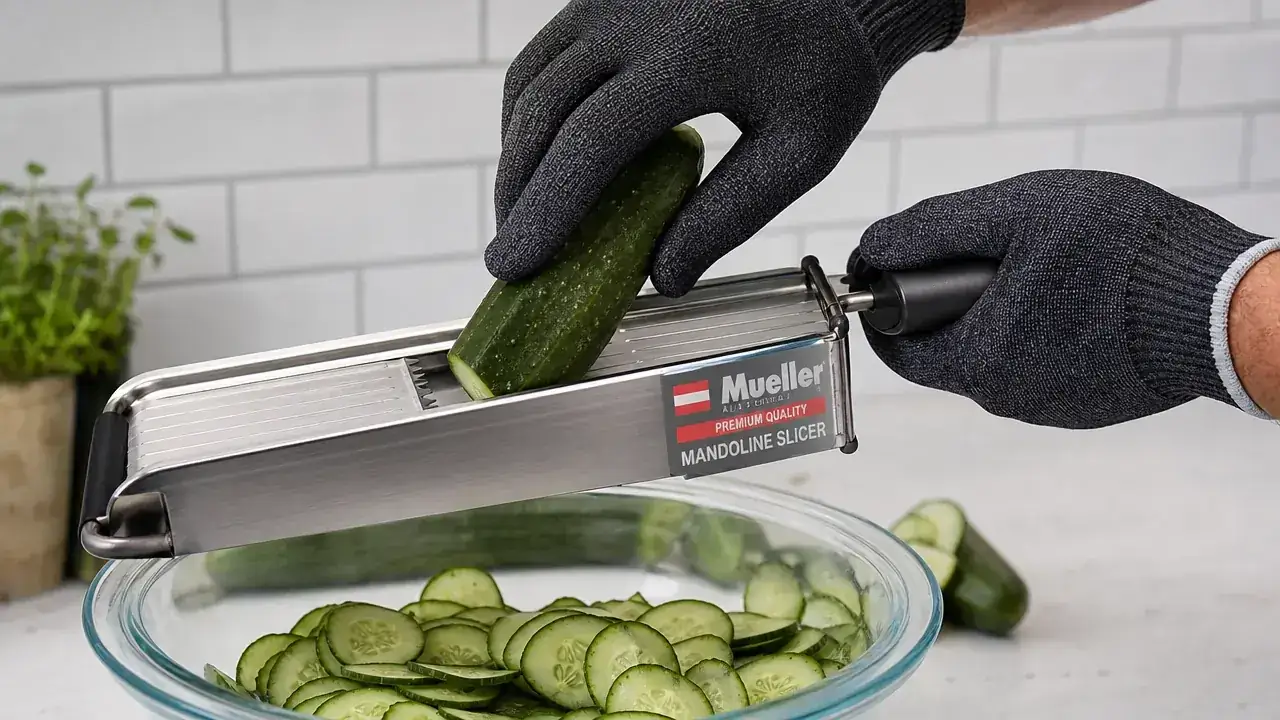
Step 5: Use a Smooth, Controlled Stroke and Stop Before the End
With your gloved hand on the vegetable and your dominant hand steadying the mandoline frame, push the vegetable away from you across the blade in one smooth, even stroke. Do not saw back and forth. One direction only: away from you. Pull back without pressing down, then push forward for the next slice. The blade does the cutting. Your job is consistent pressure and a straight path.
Speed matters less than steadiness. A slow, controlled stroke gives you cleaner cuts than a fast, sloppy one. As you get comfortable, the pace naturally picks up. For context: once you have the technique, slicing a full cucumber takes about 45 seconds on the mandoline slicer. That same job with a knife takes two to three minutes and produces slices of varying thickness.
Stop slicing when the vegetable stub is about the size of your palm, roughly two inches long. This is the danger zone: the stub is small enough that your fingers are close to the blade. Put the stub aside. Use it in stock, compost it, or snack on it. Do not chase those last two slices. The time saved is not worth the risk, and you will develop the discipline to stop there after one or two sessions.
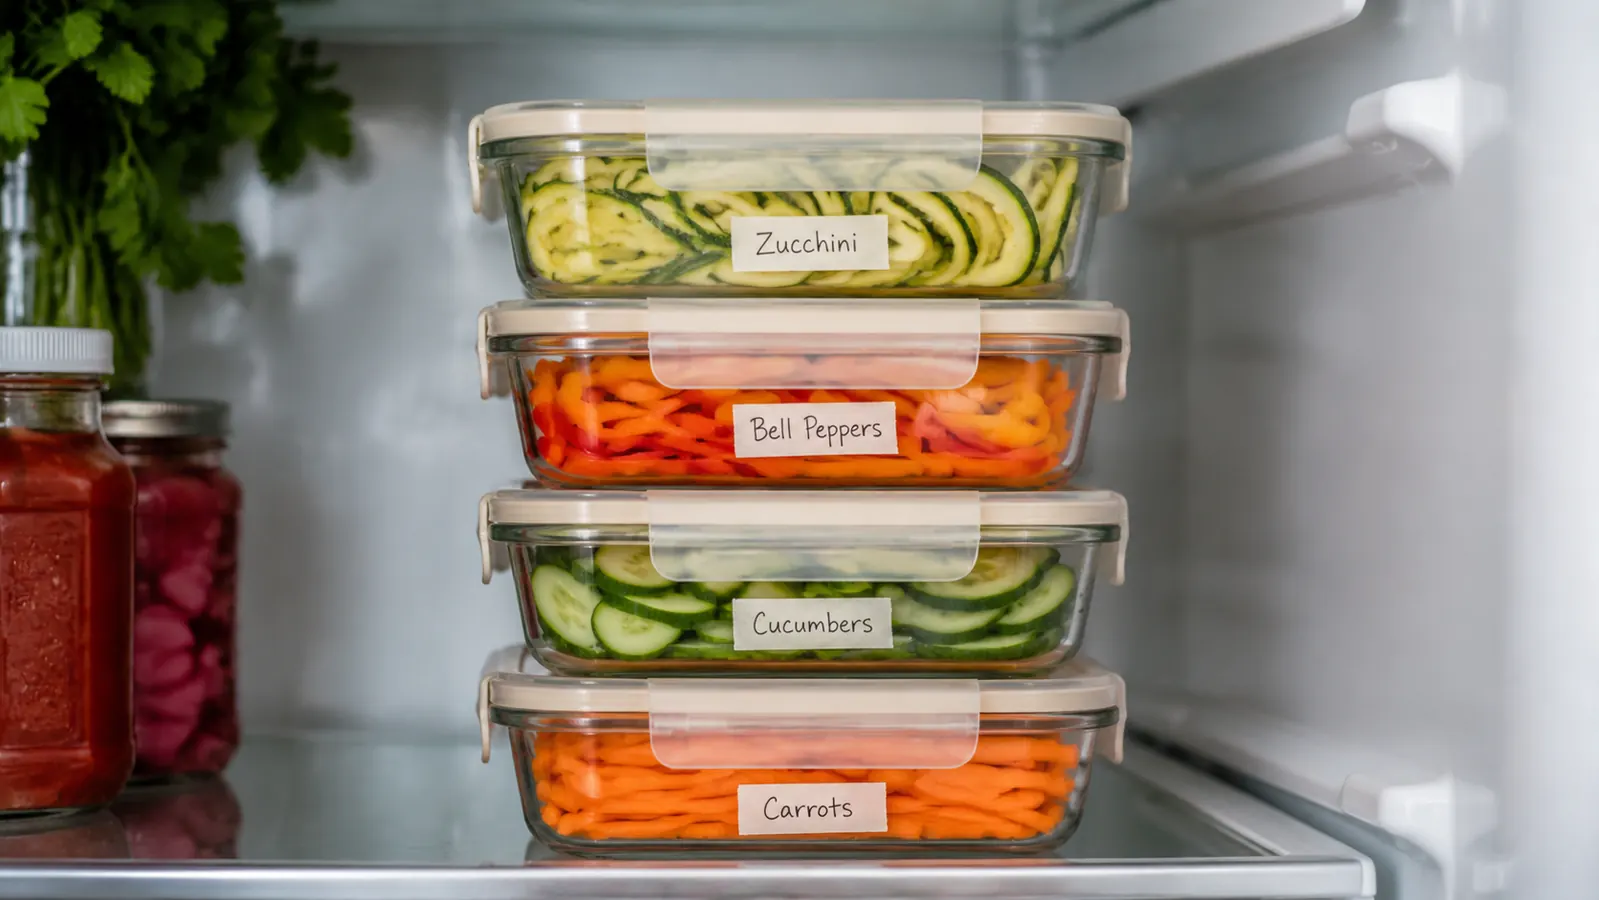
Step 6: Batch Prep for the Week While You Have Everything Out
Once you have the mandoline set up and a blade locked in, the marginal cost of slicing two more vegetables is almost zero. This is where the tool pays for itself in daily cooking time. I typically pick one prep session on Sunday and run through everything I know I will use in the next four days: half a head of cabbage for slaws and tacos, two zucchini for sheet-pan dinners, a fennel bulb for salads, and a couple of cucumbers for snacking and grain bowls.
Store prepped slices in glass containers with a dry paper towel inside to absorb moisture. Cucumbers and zucchini stay crisp for three to four days. Cabbage and fennel last up to five days. Carrots and beets stay firm for nearly a week. Having pre-sliced vegetables in the fridge cuts dinner prep from twenty minutes to five on busy weeknights, and it is the single biggest reason I eat more vegetables than I used to.

Cleaning the Mandoline Safely After Each Use
Cleaning is the second most dangerous part of using a mandoline, right after actual slicing. Never reach a bare hand toward the blade to wipe it. Use a damp brush or the soft side of a sponge, moving from the back of the blade to the front, away from the edge, not across it. The Mueller's blades are dishwasher-safe, but hand washing with a brush is faster, safer, and extends blade life considerably over repeated dishwasher cycles.
Remove the blade insert before rinsing the frame. Rinse the frame separately. If food is stuck in the blade insert, soak it in warm soapy water for five minutes, then use a narrow brush to dislodge it. Store blade inserts in the included case, not loose in a drawer where you might reach in blindly and cut yourself. Treat that storage case as non-optional. A blade sitting loose in a drawer will cut someone eventually.
What Else Helps Your Vegetable Prep Routine
A mandoline handles uniform slicing better than anything else, but a few supporting tools make the whole routine faster. A large mixing bowl under the slicer catches slices without scattering. A bench scraper moves sliced vegetables into containers quickly without you touching them all individually. Glass meal-prep containers keep sliced vegetables fresher than plastic bags because they seal tighter and do not absorb odors over time. And a simple pepper grinder and squeeze bottle of olive oil next to your containers means you can season directly into the container as you pack it, saving another step later.
The goal is reducing decision fatigue and physical effort at the point where most home cooks give up on healthy eating, which is the moment dinner prep looks complicated on a Tuesday night. When sliced vegetables are already in the fridge and the mandoline is clean and ready for the next session, that threshold mostly disappears. You stop making excuses and just cook.
If this is how you want your Tuesday nights to look, the Mueller mandoline is the place to start.
Twelve blade attachments, a no-slip base, adjustable thickness from 1mm to 9mm, and more than 39,000 verified reviews. It is not perfect but it earns its counter space in a way that very few kitchen gadgets actually do. Check current pricing on Amazon before your next grocery run.
Amazon Check Today's Price on Amazon →